Creation and Management of Visits in the Property Sheet
This comprehensive and detailed guide will walk you step by step through the process of creating and managing visits within the real estate system, focusing specifically on the functionalities accessible from the property sheet. You will discover how to schedule visits efficiently, properly link demands, and take advantage of all available tools to optimize the management and follow-up of each meeting.
Introduction to Visit Tracking
Visits are an essential element within real estate tracking. Although the system allows generating visits from different modules, such as the agenda, demand tracking, or the crosses section, this guide focuses on the direct procedure from the property sheet, ensuring precise and organized control.
Creating a Visit from the Property Sheet
To start the process, access the properties module within the system.
Access the Properties Module: On the left sidebar, locate and select the "Properties" option.
Select the Property: Search for and choose the specific property for which you want to schedule a visit. You can opt for an existing property or one that has crosses to follow the complete and detailed process.
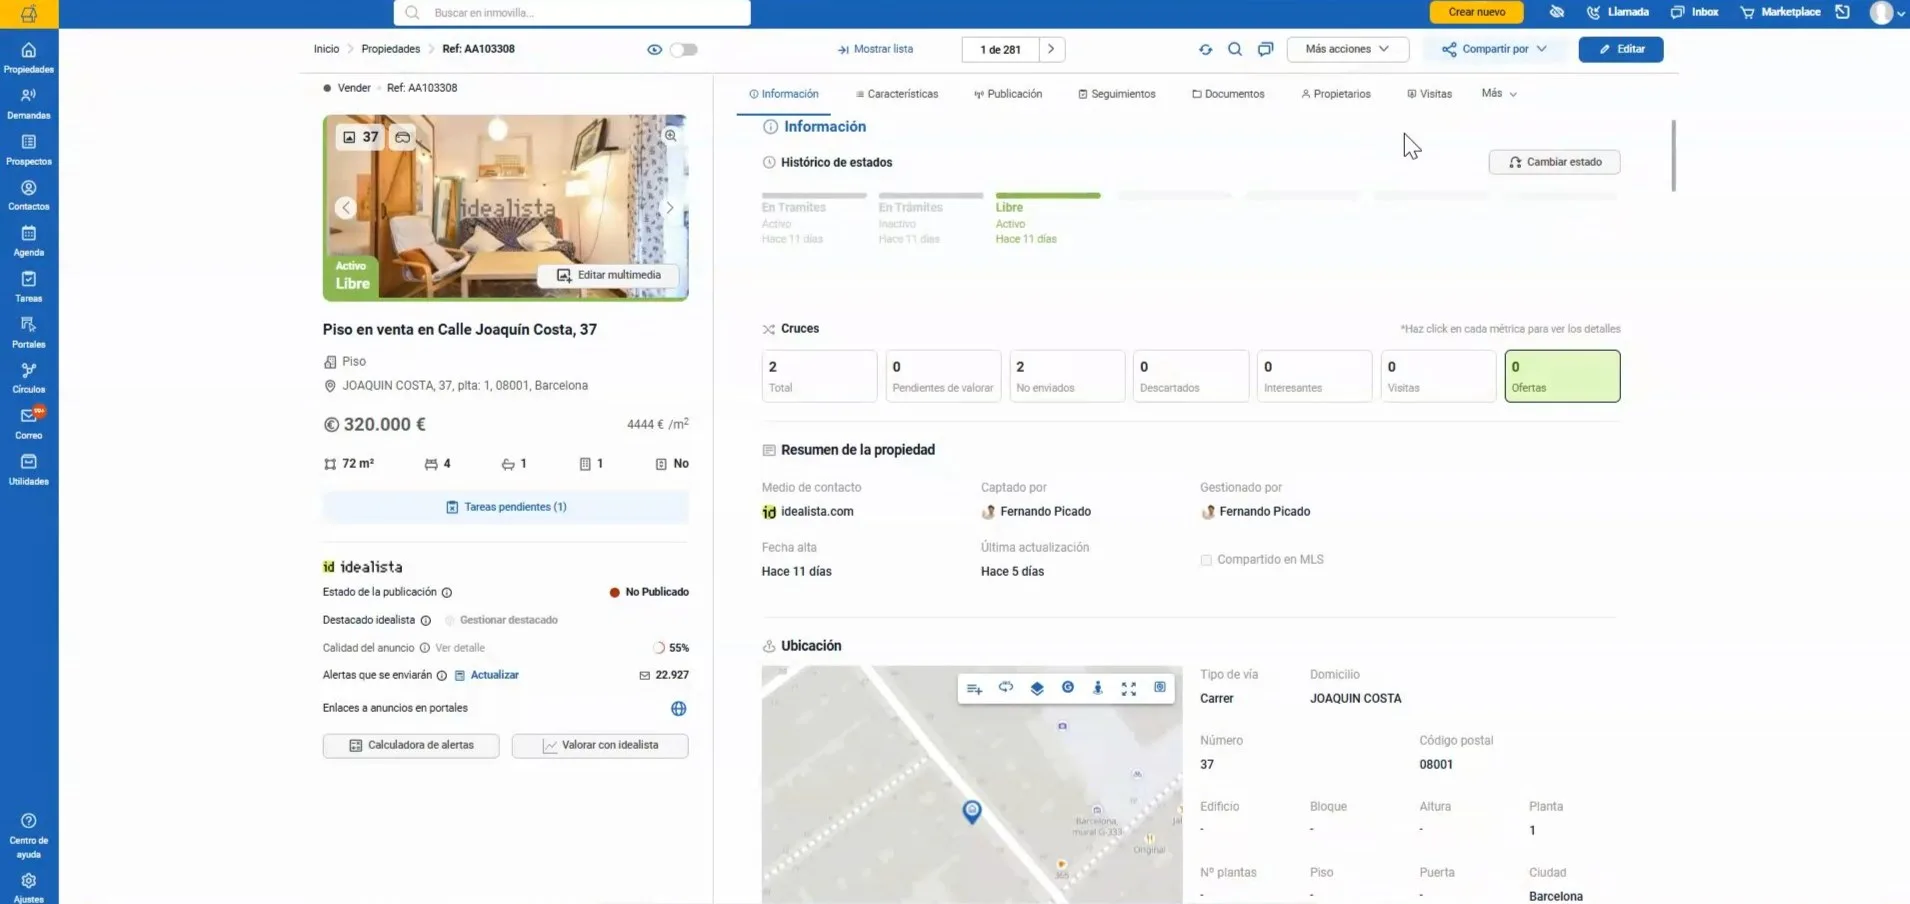
Navigation within the Property Sheet
Once inside the property sheet, you will find a set of tabs at the top that facilitate navigation between different relevant sections.
Top Tabs: These include sections such as tracking, history, among others, allowing quick access to key information.
Direct Access to Visits: Although visits are a type of tracking, the system places them in a separate tab due to their frequent use, allowing faster and more efficient access. Click on the "Visits" tab.
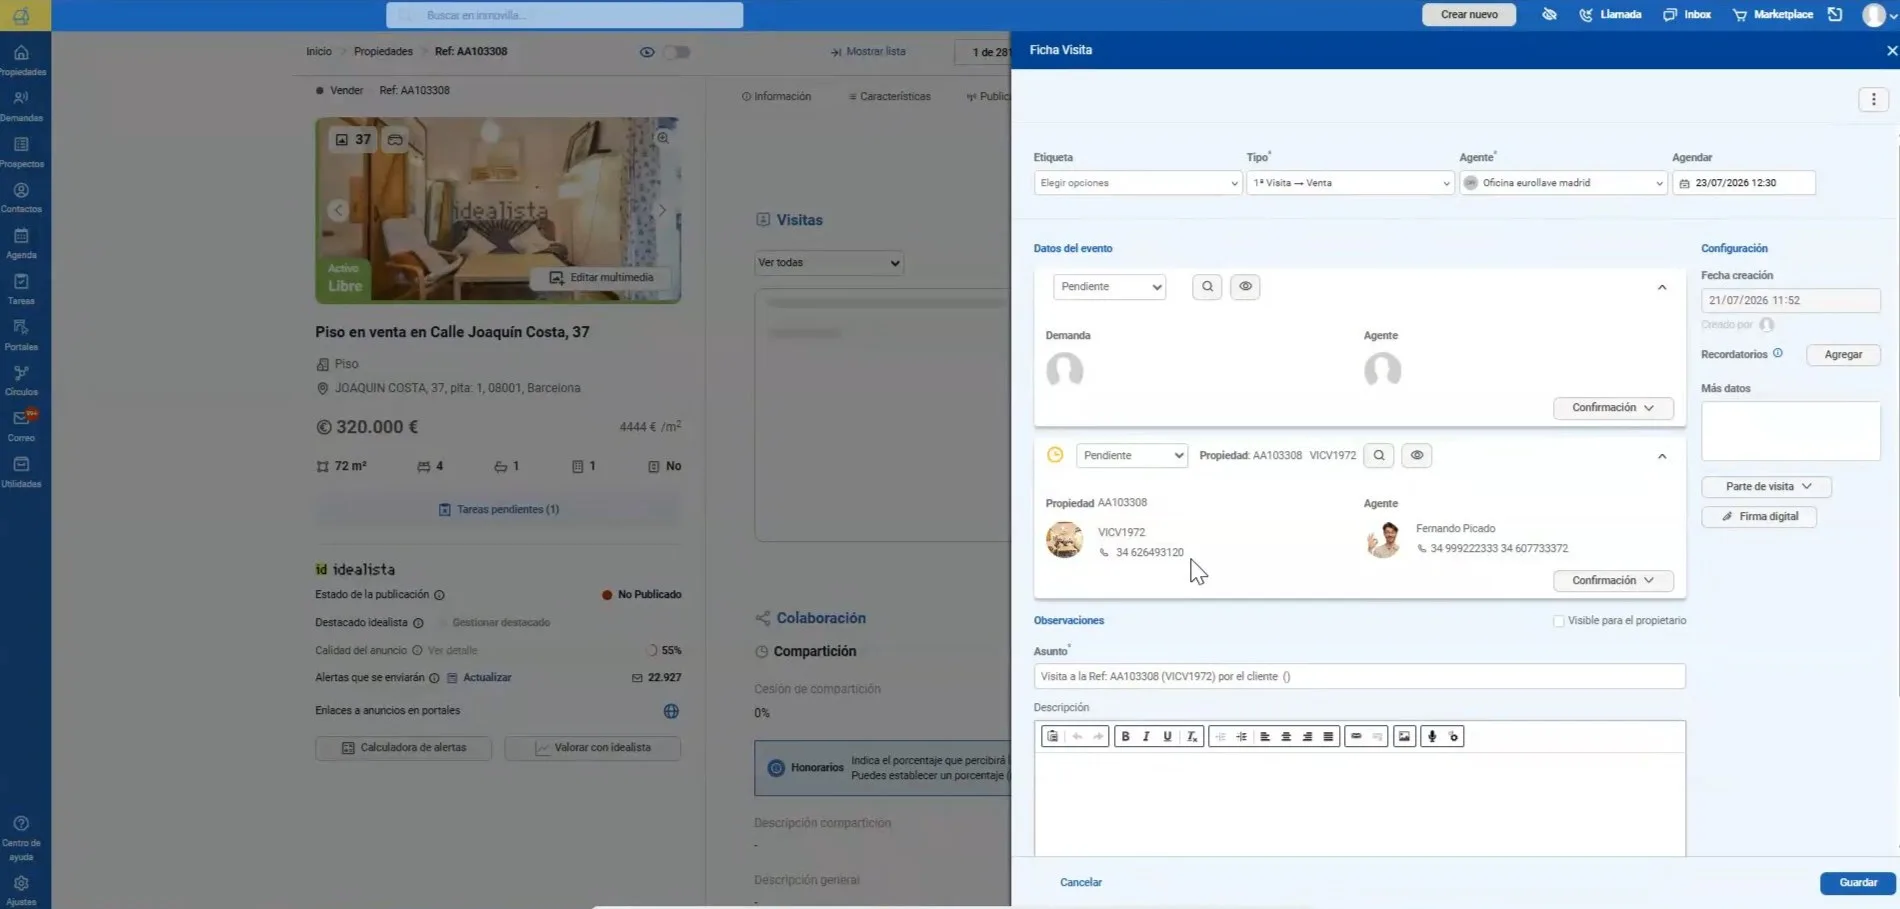
Scheduling a New Visit
In the property's visits section, if there are no scheduled visits, the system will show you the option to create a new one.
Start New Visit: Click the "New Visit" button to begin the process.
Initial Configuration:
Tagging: Optionally, you can assign tags to the visit for better organization and classification.
Agent: Assign the agent responsible for managing the visit, ensuring clear and direct assignment.
Date and Time: Select precisely the scheduled date and time for the visit, for example, a Thursday at 12:30 PM.
Association of Property and Demand
It is essential to understand that every visit must be obligatorily linked to a demand and a property. It is not possible to create a visit only with a contact or collaborator without this association.
Property Automatically Associated: When generating the visit from the property sheet, it is automatically linked, avoiding errors and speeding up the process.
Search and Selection of Demand: The next step is to associate the corresponding demand.
Use the search field to view existing demands in the system.
Filter demands by number or name to facilitate location, for example, search for "Test in area".
Select the appropriate demand from the displayed results.
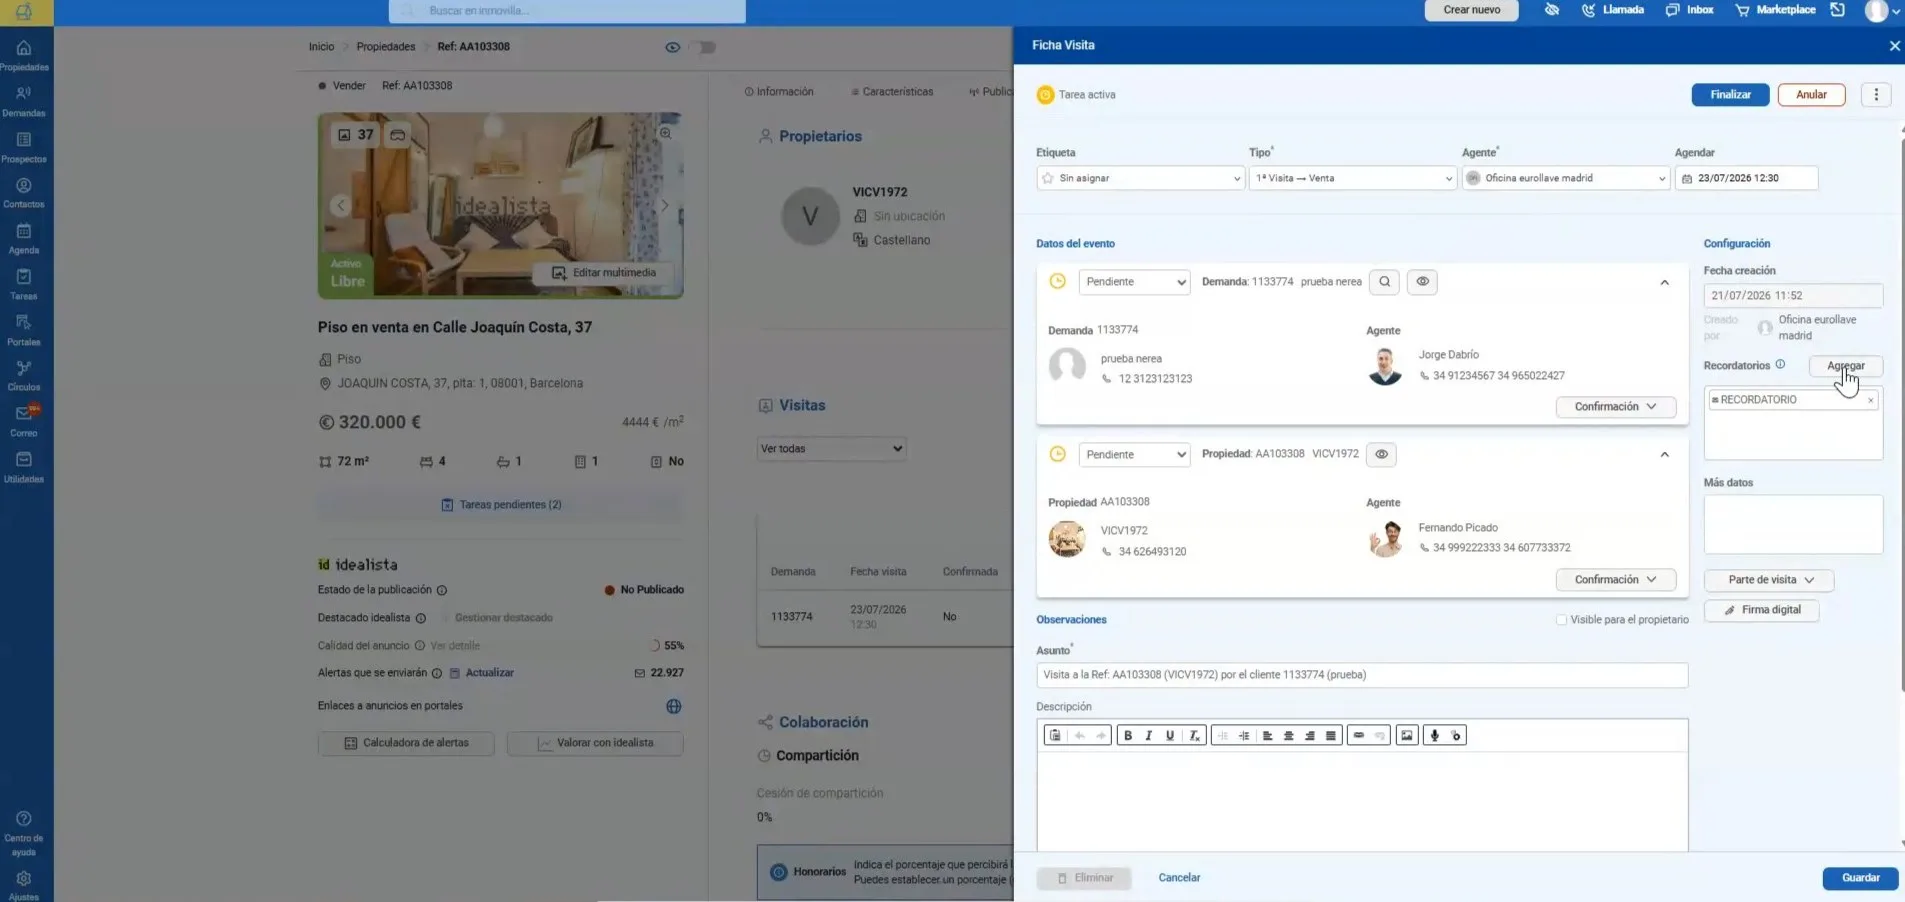
Confirmation and Saving of the Visit
Once the demand and property are correctly linked, you can finalize the creation of the visit.
Observations: Add any comments or relevant details about the visit in the designated field, contributing to better follow-up.
Save: Press the "Save" button to register the visit in the system. Upon returning to the visits section, you will see the new entry reflected in the list.
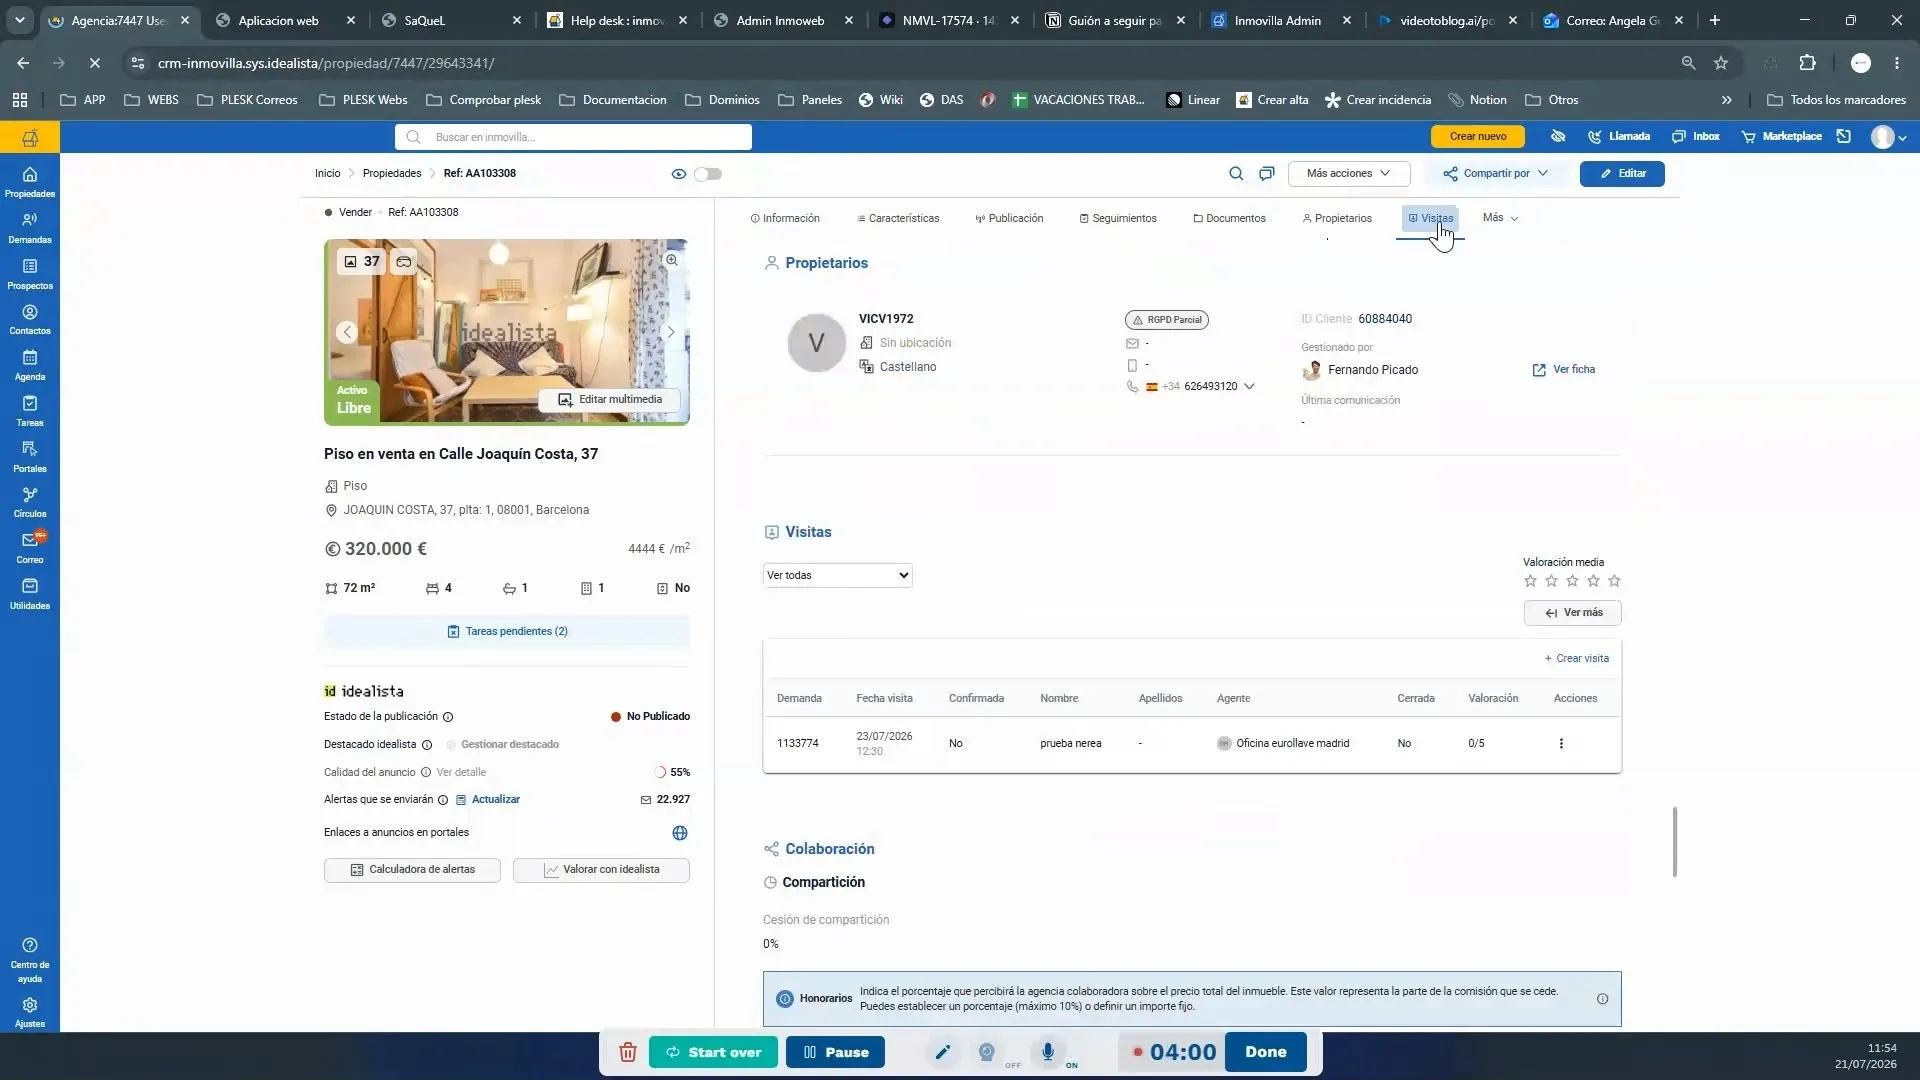
Advanced Visit Management Options
Once the visit is created, the system offers multiple advanced functionalities for comprehensive and personalized management.
Duplicate Visit
The option to duplicate an existing visit allows copying the same demand and property, facilitating the quick scheduling of similar visits by only adjusting the date and time.
Functions within the Visit
By selecting a specific visit in the list, you will access its details and a set of advanced tools for its management.
Reminders: Set custom alerts, for example, a notification one hour before, to ensure punctuality and preparation of the agent and clients.
Digital Signature: Start the electronic signature process for documents related to the visit, such as the visit report, simplifying formalization and registration.
Visit Confirmation: Send communications via email or WhatsApp to both the demand and the owner, facilitating visit confirmation through a direct link.
Documentation and Statistics
Visit Report: Access the official "Visit Report" document and its URL, ideal for performing the digital signature directly from a tablet during the meeting.
Statistics for the Owner: You can indicate if this visit should be included in the statistical reports periodically sent to the owner, providing transparency and detailed tracking.
Cancellation and Completion
Cancel Visit: In case of cancellation, the visit can be annulled from this section, keeping the history updated and avoiding confusion [→].
Complete Visit: Once the visit has taken place, mark it as completed to correctly reflect the status and close the process [→].
More Management Options
Surveys: Send predefined surveys to participants to collect valuable feedback that helps improve the service.
Comments via Email/WhatsApp: Send specific and personalized comments to the owner or demand via email or WhatsApp, facilitating direct and effective communication.
Generate Visit from Crosses: The Most Efficient Option
The fastest and recommended way to create a visit is to do it directly from the crosses section, especially when you already have identified interested demands, thus optimizing the workflow.
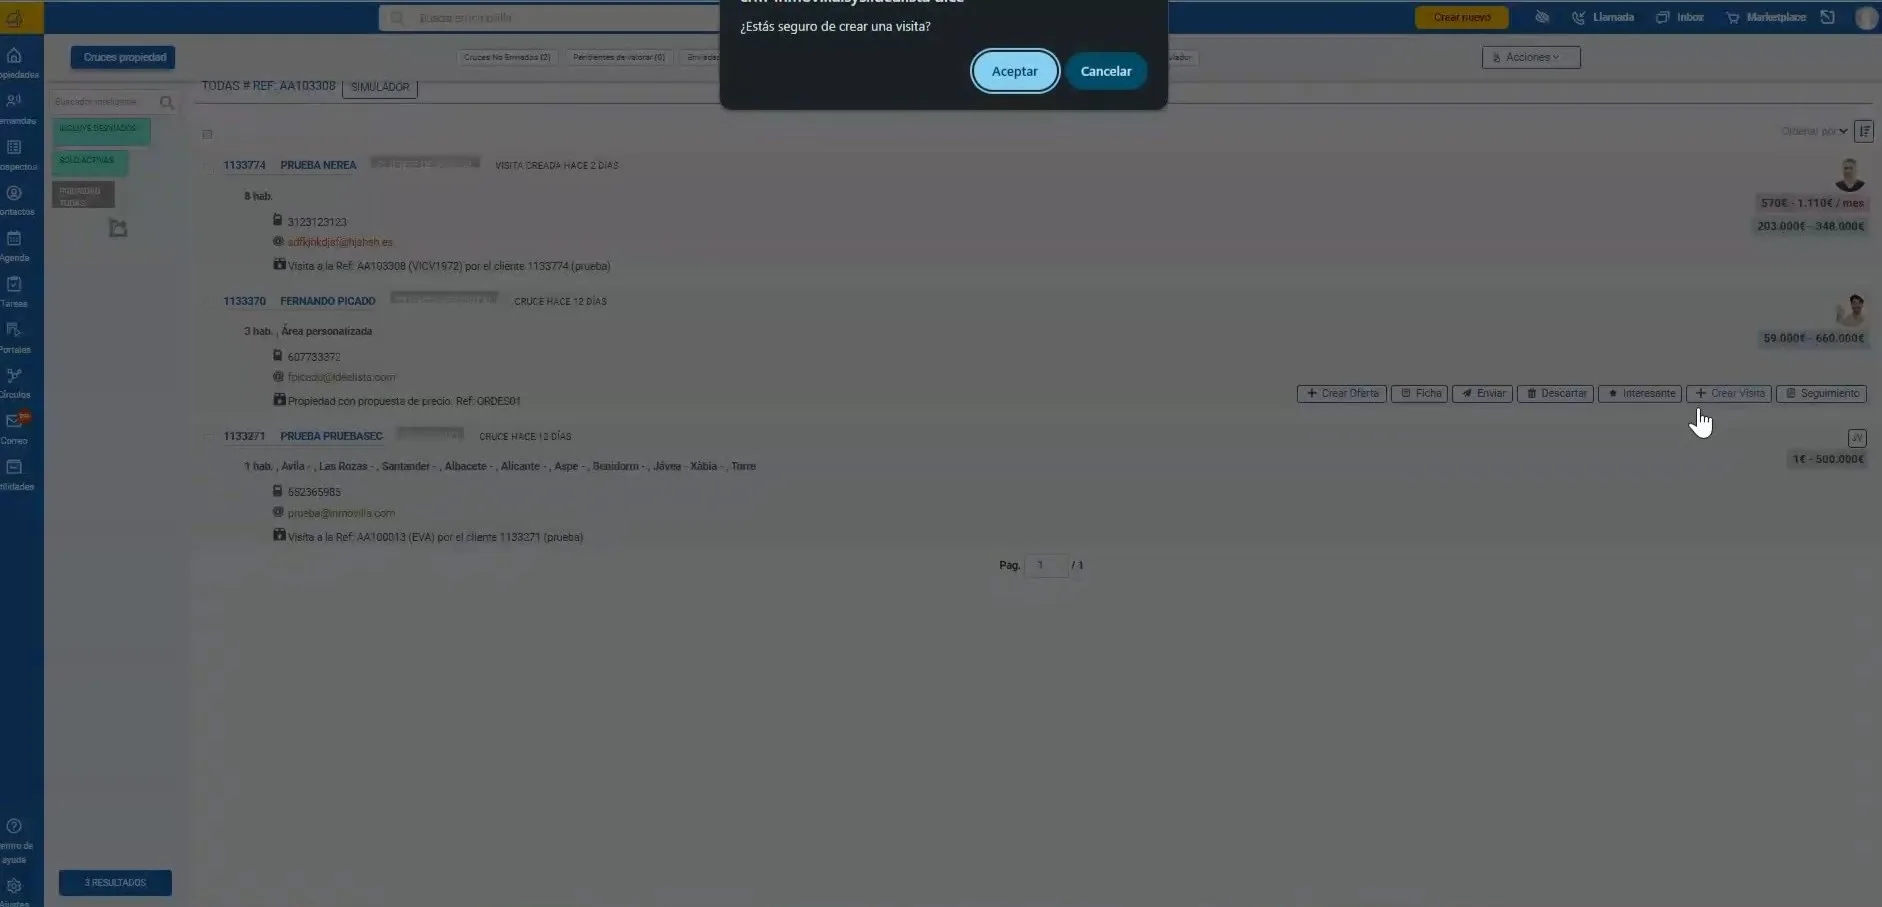
Access Crosses: From the property sheet, navigate to the "Crosses" tab.
Identify Interested Demands: View the list of demands that meet the established criteria for the property.
Create Visit Directly: Select the desired demand and click the "Create Visit" option.
Simplified Configuration: When generating the visit from crosses, both the property and demand are automatically associated, requiring only that you select the date and time to complete the scheduling.
Conclusion
Effective visit management is a fundamental pillar in the success of the real estate process. Whether you choose to create them directly from the property sheet or through the faster method from crosses, the system provides you with all the necessary tools to schedule, manage, and document each meeting in an orderly and professional manner, always ensuring the correct linkage between demand and property [→].
Perguntas frequentes
Isto foi útil?